Archive for the ‘3dsMax’ tag
Aging
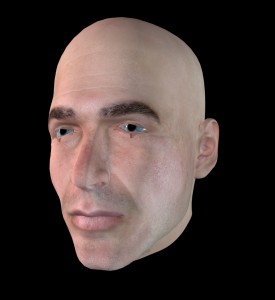
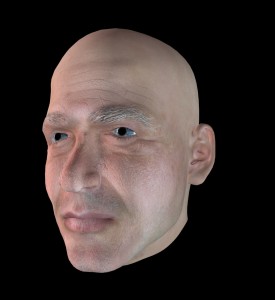
Meet Simon…
Simon is one of the default figures from the program Poser. I recently grabbed him for use in a 3D animation we are creating about cataract surgery. The thing is, he’s the oldest looking head I could find in our files, but he still doesn’t look old enough to be having cataract surgery to me.
Now, initially, I thought that I could make my facial adjustments in Poser and import that work directly into 3DsMax. The catch with that was, that while there are a lot of cool facial adjustments that Poser allows you to make, the adjusted texture map wasn’t exporting correctly, so you were left without use of the photo realistic skin. I used one such image for the animatic, and simply created a basic skin tone for the figure. Here is one of the stills from that scene and you can see that a lot of work would need to happen to make that skin come across more realistically…
Texture maps are actually pretty strange looking when unwrapped to a 2D plane. So rather than trying to paint a new texture map for this head, and have to guess at where the nose and lips should be to paint them in, I decided to go back to the original Simon with the good texture map and see what adjustments I could make to that outside of Poser.
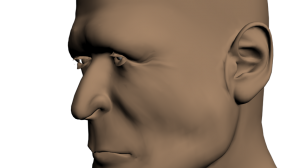
The first area I looked at were the eyes. I wanted to make them baggier and I needed the eyebrows to show some graying. I drew some simple wrinkles into a bump map and placed that into the material in 3DsMax and got the following…
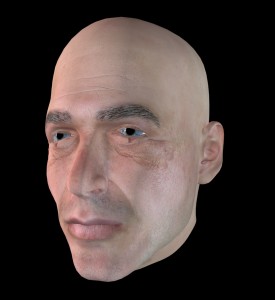
The outcome was a far cry from perfect, but allowed me to see how this was going to work. So I went back to work on it. I further grayed the eyebrows, and started finding good pictures of people with strong wrinkles. This whole week I’ve felt like Dr. Frankenstein, sifting through old people to harvest their wrinkles for my own creation! I also made some minor adjustments to the heads shape itself in 3DsMax using the paint deformation modifier. This allowed me to push and pull certain areas without ruining the texture map’s positioning. Stamping wrinkles into a bump map layer in Photoshop, I wound up coming up with something like this…
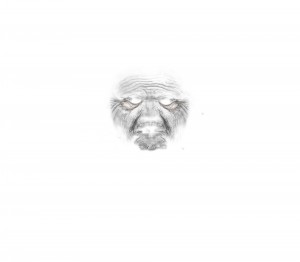 ..which when applied as a bump map to the head’s material, gives you awesome wrinkles!
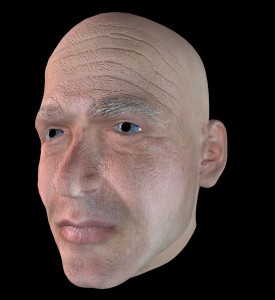
And in his latest incarnation, he has been toned down to look like this…
He still needs a little more work, but for now, I’m really happy with the aging I’ve managed to get on him. The shape changes are subtle, but they help. The wrinkles are playing off pretty naturally, and I’m really excited about that. I just need to find a few more and then I can go into futzing with the way the skin handles light.
Overall though, this has just been a really neat project. So often when we think about aging, it’s a worry, it’s unwanted. But this has been an awesome chance to just study faces and enjoy how cool some of these “ravages of time” really are. I like that our faces change over our lives. It’s neat. Someone reminded me recently that wrinkles run perpendicularly to muscle striations in the face, and looking at so many of them for so long, it feels like a very human thing. It’s like, in time we reveal our inner workings, let down the mask a little. Don’t get me wrong, I’m not exactly anxious to take on so many lines myself here yet, but they are neat. They tell a story. And aging this little digital man is really fun.
Animation Woes
I’m going to try something a little bit differently here today. I’m going to write about a problem that I have been encountering lately using 3DsMax. Maybe, just maybe, someone reading here will have some insight.
So, I’ve been taking a class lately on medical 3D animation. For my topic, I chose to delve further into the sliding filament theory of muscle contraction. I was having a little trouble getting the myosin necks to move appropriately and the advice to that was to use bones. Having never done that before, it’s been a madhouse of tutorials and learning all that I can about using them. It took a little while but I finally got them to work. Now, being an individual neck of the myosin, it made sense to instance the little heads and neck cluster across the myofilament, and then instance the myofilament itself to build the 3D reality of how myosin and actin myofilaments interact.
Sounds great right? Well I thought so. And I sure was excited when I finally got the bones set up with inverse kinematics, and the myosin heads and neck shape skinning it without distortion. I made a bunch of instances, and the whole row of them would do a little chorus line dance when I pulled the strings on the lead myosin head and neck group. The next part is where it starts to get wonky.
So I took my instances and carefully placed them all along the body of the myofilament. I found that removing the kinematics and bones from the instances allowed me more flexability in placement and still kept the movements I was after. Everything looked great. You might even say it was fantastic. But after several rebuilds of my scene, I have come to learn that this is the exact point where things go haywire. I have been saving the project all along, but it seems that I cannot open any of the saved versions after this point. Well, I *can* open them, but it’s never the way I’ve left it.
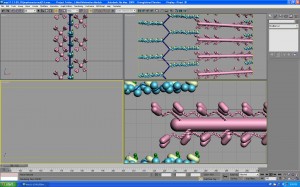
So for instance, this is a screen shot of my happy little project *prior* to turning anything off, or shutting down…
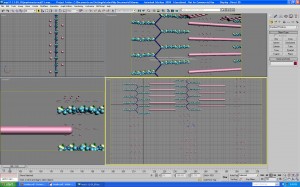
Then this is what happens when I open the same project later (I believe there are actually a few minutes of work between these two screen shots, but not much). The myosin heads and necks fly off, out into my scene. As you can see, I’m hitting a glitch…
So I spoke with a friend about it, who has done some work in games. He had me convinced that the problem I was hitting just had to be the mirror modifier that I’d used to make the intertwined necks of the myosin heads. So I deleted and rebuilt the myosin yet again, only to learn that the mirror modifier is not in fact the problem, and I am still unable to save and reopen the project.
My modifier stack is clean as a whistle, just the object used as skin and the skin modifier. My bones on their own right are great. My inverse kinematics are just what I wanted. This happens whether objects are grouped or ungrouped. The actin myofilaments remain unaffected. So what is going on with my myosin? I am at a complete loss for this one.
If any of you reading have ever come across this before, I would love to hear about it, and particularly what you did to either fix it or get around it.
animation – the possibilities
Last week, I posted my very first animation. It was created using 3dsMax, and then I added some sound in Final Cut Pro afterwards. It was pretty cool figuring out how to make all those little objects move around and interact with one another.
I’ve been thinking a lot about animation lately. Just last week I spoke with a surgeon who is interested in creating patient education animations to give to his patients prior to surgery. This has me thinking a lot about what is possible there, and what is appropriate. There is a website, Understand.com that specializes in doing this kind of thing. Some of their pieces I like better than others. It’s nice having some time to think about what I feel is important to a patient education video, and to talk to previous patients of various procedures about the kinds of things that they understood going into surgery, and what they wished they’d understood afterwards. If anyone reading has any thoughts and/or personal experiences to this end, I ask you to please comment with your thoughts.
