Archive for the ‘After Effects’ tag
The Wiggle Expression
Recently at work, I’ve had cause to use the wiggle expression in After Effects. If you’ve never done this, it’s pretty simple to set up. First, open up the transform controls in your timeline for the object to which you intend to apply the effect. Then alt-click the position stopwatch. You’ll be prompted to add an expression in the timeline under the layer, and there you’ll write wiggle(1,20). Actually, the numbers will be whatever you want them to be. The first specifies how many wiggles per second you want to apply. The second specifies the amplitude of the wiggle in pixels.
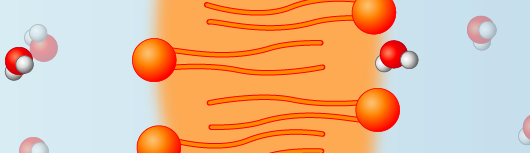
In my case, this effect was really great for bobbing around a bunch of molecules in a scene. But I ran into trouble when I wanted to ease up the effect for more control. To use my example again, I needed molecules to bob around in liquid, and then pass through a semi-permeable membrane, which required more control over them, and then go back to bobbing about.
So, to do this, you need a slider control layer. So you’ll create a new adjustment layer. Then under the effects pull-down, up top, go to expression controls, and then slider control. Then you’ll highlight the number on your expression that you’d like slider control over. In my case it was the amplitude (see the 20 in the example). With that number highlighted, you’ll grab the pickwick (looks like a swirl) and literally pull it up toward the slider stopwatch. You’ll see your code change it it’s worked.
Your wiggle expression will then be defaulted to zero until you dial the slider control up. Now you can keyframe that feature to begin slowly, or to reduce mid animation for greater position control when you need it.
Some of this is easier to understand when you see it, and doesn’t really lend itself well to explanatory screen shots. This YouTube video by Ian Killick does a great job of showing the process…
Animation in Layers
Goodness me, it’s the 4th of July and I intend to go jump in a pool and play in a little while. But first I wanted to pop in and say a few words over here. Lately over at Sapling I’ve been pretty consumed with an animation that I’m putting together over there. It’s been a whole lot of work, and it’s nearly finished now. I get excited at times like these.
The animation is about the translation process. From a technical standpoint, it’s been interesting how much time I’ve been spending in the program, After Effects. I usually do a little compositing there, but then have generally brought my work into Final Cut Pro or something like that to finish up the actual shot arrangement. With this one, I’ve found it made more sense to actually just put the whole thing together in After Effects. I’m having to be really careful about organization and use a lot of pre-compositions. And even so, I don’t believe that I have ever taken on this many layers of video to wrangle for another project in my entire life. That’s the thing about animation though I guess. You literally make all of it from scratch.
![]()
One thing that I don’t care for in After Effects as opposed to your more editing and less effect driven software, is it’s insistence that every little thing have it’s own layer. This has been one of those pieces for which I’ve wanted a lot of layered subtlety going on behind the scene. It would have been nice to be able to dedicate a couple of tracks for that, rather than adding a new one for every piece of footage used. That being said though, After Effects does a great job at handling image sequence footage and you do have a great deal of control over a lot of details. Still, if anyone from Adobe happens to read this, maybe the next version could at least give us the ability to group tracks into folders. For when you don’t quite want to create a pre-composition and send your tracks to another timeline, but you still want to clean them up a bit for viewing sake, or to add some sort of matting to the whole bundle, just that one little thing would make After Effects so much better in general.
I especially thought that when I got into the part of this animation that I like to call the breakdown. Textbooks often use similar static illustrations to represent things that may or may not atomically look like the molecule in question. And really it’s only rather recently with the work of Dr. Venki Ramakrishnan (video link to a lecture of his about the ribosome and translation process) that we even fully know the exact structure of the ribosome. So one of the things that I’ve been excited to do with this one is to create some more standard looking images and then layer them over the 3D animation. I then keyframed the individual components to follow their 3D counterparts so we can actually see the connection between those representations and a more 3D space. I have been simultaneously irritated with myself for coming up with such a time consuming and intricate thing to create to tell this story, while also really psyched to get to break everything down so clearly. As it’s come together, every codon in the 2D overlay has had to have it’s own layer in After Effects, but now that I finally have everything placed and animated, I’m really excited about it. Back in school, I recall one of our teachers, John Daugherty, telling us about how every piece that you do has to have that thing that makes it really interesting to you as an artist. Whether it’s a concept, or a technique, or whatever, and I think this part of this animation is that for me. It’s something that I don’t see other animations doing, and for me it’s like wrapping up that little aha moment that you get when you’re watching these sorts of things and you finally figure out how one representation relates to another and start to get what it is that you’re seeing.
![]()
As you can see, though, I’ve got these huge blocks of layers in the timeline there. At one point, I had more than 60 in there, and that’s with many of them being pre-compositions that lead to more layers in another timeline. But it’s working. And I just love it when things work.
This is going to be a good one.
Still Shot from Working with my Animation
Just working with my animation footage in After Effects this afternoon, and stumbled into this image. Thought it was pretty cool and worth sharing.

That comes from layering the ambient occlusion pass of my shot with the skull set to multiply and 40% opacity, over the shot of the soft tissue in the same position so that it ghosts the underlying anatomy.
Pretty neat!
My 3D Animation and Graphics Demo Reel
Here it is, my demo reel!
I cut this together using Final Cut Pro. I created the titles in After Effects. And the pieces you see are clips from the animations I have worked on here at UIC, mixed with some 3D stills, and a couple of illustrations I recently put to motion, again using After Effects.