Takayuki Hori
So, I was just thinking how it’s gotten awfully technical around here lately, and I should show some more artists’ work for a change of pace again. And then tonight I stumbled into Tatayuki Hori’s Oritsunagumono (things folded and connected), winner of the 2001 Mitsubishi Chemical Junior Designer Award, according to Colossal Art and Design.
I wish that I had a direct website to point you towards for the artist directly, but for all of the blog articles available on his work, I haven’t seen anything from him directly. If any of you reading know of a more direct source, please comment.
As for the project itself, please allow me to copy the description up at Design Bloom…
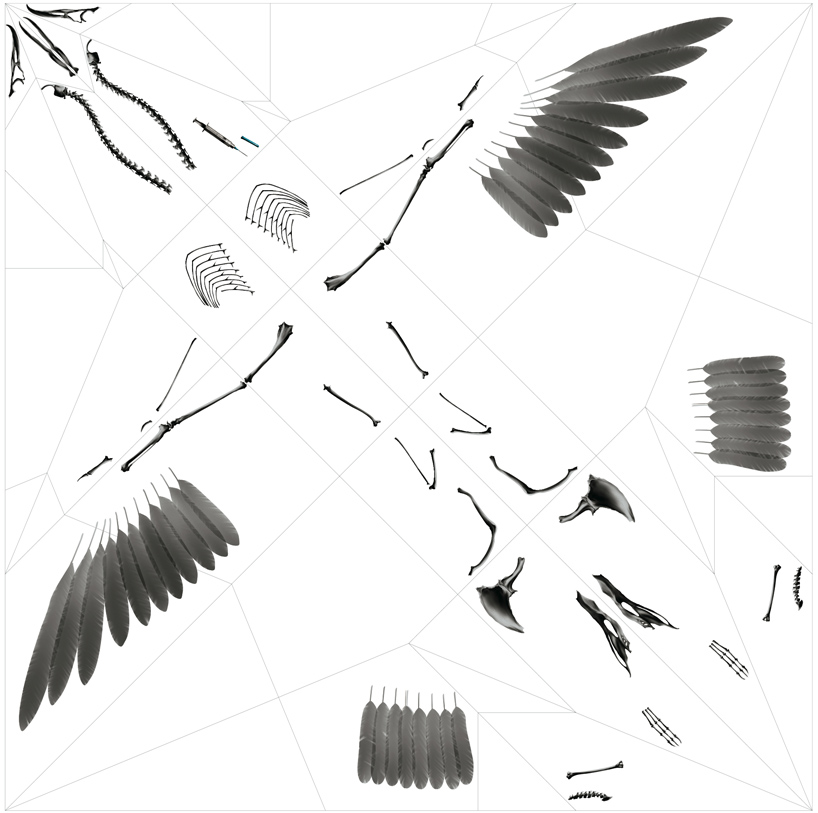
“each translucent sheet is first printed with either the images of fragments of an animal’s skeleton, or,
on some pages, human-made discarded objects that are often ingested by the animals in the wild.
using the ancient tradition of folded paper, hori assembles the pages into a three-dimensional model.
once the paper is folded, the printed components are united as a whole, telling the visual story
of the animal’s plight to survive in an increasingly polluted and hazardous ecosystem.”
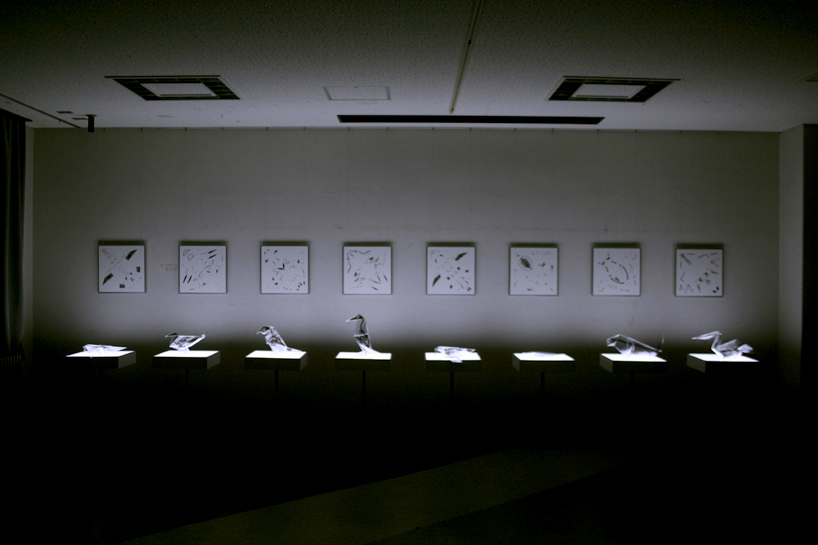
The exhibition at large, looks like this…
…with each figure underlit so that it emphasizes the translucency and fragility of the piece, and each featured next to a wall hanging of the printing diagram prior to folding.
Here is one of the diagrams.
And here is the 3D model of that same piece.
Impressive work, most certainly.
Video Sequence Settings for HD Animation
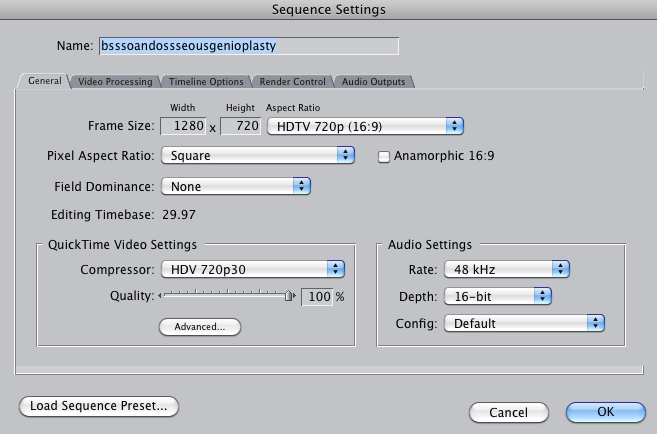
Because there will no doubt come a time when I will want to remember, and because some of you reading may also be trying to sort this one out for yourselves. So far, the best sequence settings I have found for HD animation in Final Cut Pro have been as shown here…
That is all for now.
A Long Saga of Gimbal Entrapment and the Horrors of Hotfix 4
Oh Readers,
Last night I think I broke my brain again.
It took me a week to get that rotational issue settled. I went from trying various gizmo alignments, to scouring tutorial after tutorial, and then basically waving my arms in the air begging for advice from the world, which lead to a focus in learning how to set up helpers and then when that didn’t work, going through every rotational instruction I could find. In the end, I used the Euler rotations from the pull down menu and changed the settings from the standard XYZ to ZXZ. This spins your object off in a new direction, but I readjusted the object and was finally able to control it’s rotation again and finish the shot. To me, this seemed like a positively insane solution. According to the readings I must have been gimbal locked, and resetting the orientation gave me a clean slate of sorts. At least that’s my current understanding of it. I could be way off base.
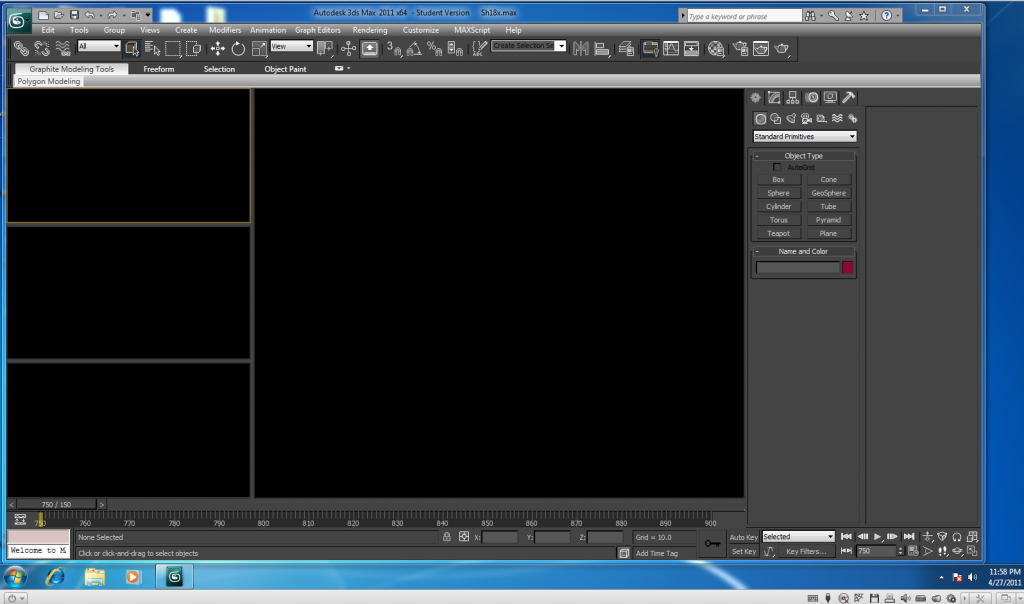
Regardless, this was a difficult saga for me. So what a relief to finally be through that and rendering the shots already, right? But then the renders kept crashing, and after the third error report sent to Autodesk I get this update recommendation. So I click to install it, and the next thing I know, my project looks like this…
So much for going to bed then right? Now I know that the worst thing that you can do in the event of something like this is to panic, but readers I must confess, I hit panic mode last night. It had finally been working and then just like that, boom, blackness, and my entire grad school experience flashed before me, and I didn’t know what to do.
Apparently the update was the Hotfix 4 from Autodesk, and it’s done this to a few other people as well. Advice ranges from uninstalling 3DsMax entirely and reinstalling without the upgrade to changing the graphics drivers away from the recommended system in the preferences, or even upgrading or downgrading your computer’s drivers over all. And well, this is the kind of talk that tends to make me feel in over my head. This is the kind of talk that sends me tirading about the ruins of an overly technological society.
If you are reading this because you are having the same problem now, I can first tell you that going into preferences and the viewports tab and hitting the button towards the bottom of the window that says something about installing or changing drivers (it’s no longer in front of me), you can in fact change to the Open GL driver, and if you are running on 32 bit, I hear that you may want to select the Software driver (the link to where I read that here.) Anyway, that will let you see again, but I found that my objects kept going away when I was trying to select anything in the scene in that mode. So, while it does make you feel better that all of your hard work has not been lost somehow, it still doesn’t restore the functionality you had before the “upgrade.”
Well this morning I was able to get someone from Autodesk on the phone. Under the student license, they don’t let you speak first hand with technical support, but the woman on the phone was nice enough to ask around herself for me and relay what she could learn. As it turns out, you can actually uninstall the upgrade. Get rid of it, and you can use the recommended 3D graphics driver again and get back to work already.
To do this, you go through the Start menu, the Control Panel, Programs, Then I believe it is Programs and Upgrades, and you can select the horrible mistake you made last night and simply uninstall it. I don’t know if this is something that Windows generally offers for most upgrades, or only for some. But it’s a great feature, and I think it makes a lot more sense than all the other workarounds. Just remove the problem. Yeah.
Oh, and if you’re struggling with rotations like I was earlier this week and last week, this is a good write up about how some of that stuff works.
I don’t know if this is helpful for anyone else out there, or if I’m just making myself look bad in a public forum by putting my technical problems and frustrations out there for all to see. I suppose it wouldn’t be the first time for either of those to be the case.
Still Going With It…
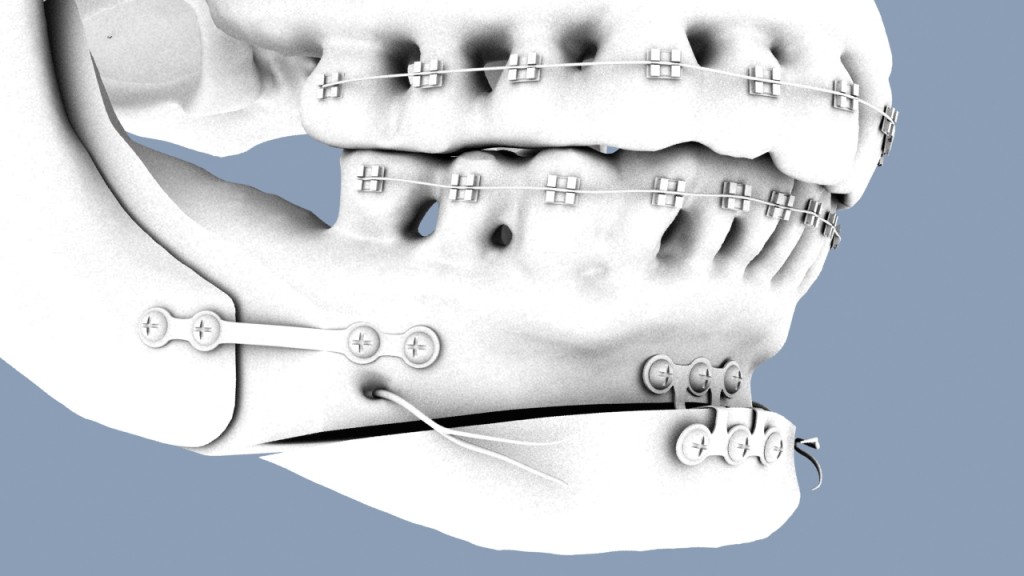
Feels like I’ve been spending all this time at the computer lately, but not as much time posting here. That could just be a perception thing, but I thought I’d post another image from my animation anyways. This is an ambient occlusion pass from my recent work. It features the plates and screws in place for both the BSSO and osseous genioplasty procedures.
At present I am struggling with making the screws enter the bone in a reasonable manner. They are happy to rotate all over the place, but I am having a Hell of a time getting them to simply screw in here. The still looks nice though. And the motion will come.
I’m actually very close to finally getting through my shot list for this animation and being able to put the finishing touches on it. Keep your fingers crossed for me readers, I need all the luck I can get with this one.
Searching for Anaplastology – Thoughts on Reaching Out
You often hear stories about patients who don’t have access to an anaplastologist, or don’t even know that they exist. Most people I encounter have never heard of anaplastology until I tell them. So I can’t help wondering how people come about finding care when they don’t get a simple recommendation from their surgeons.
The first thought is internet. Maybe I’m biased because I keep a blog, but I think that a lot of people look online for such answers. But with most of the world never having heard of an anaplastologist, what would they look under? Would they know to type in somato or facial prosthetics? Maybe they would look up specifically a nasal prosthesis or auricular prosthesis. I’ve checked, and searching for “fake ear” gets you a lot of jewelry products. As someone who often has a difficult time finding the things I want online, it pushes me to wonder about real world methods of learning about us.
So, we know that many surgeons recommend patients directly. And that really is an ideal scenario. But recently I met a speech pathologist, and we got to talking about the similar types of cases that we see. And I thought that there is another road in that you don’t often hear about. Audiologists are often aware of us, not only because of shared patients, but also because of shared surgical equipment when it comes to implants. Bone anchored hearing aides are implanted into the skull in much the same way as our implants for prosthetic retention in patients who decide to go that route. But who else can we work on bringing awareness to that will eventually help us reach the patients who need our services? I suppose that anyone working with cancer patients makes sense. I wonder if genetic counselors and people working with congenital defects generally know about us. And maybe we should work on getting our profession known out there among emergency teams, and anyone working with vehicular accident victims.
I am convinced that the scarcity of work out there for anaplastologists is not because of any lack of patient need, but more a lack of awareness in general of the care we offer. There is, in this world, a small selection of incredibly talented individuals capable of making quality prostheses that can truly improve the quality of life for a lot of individuals. I believe that we need to make ourselves better known to the population at large. No one who has suffered the loss of a body part should be left without the option for prosthetic rehabilitation. What we do, should simply always be presented as an option.
Still Shot from Working with my Animation
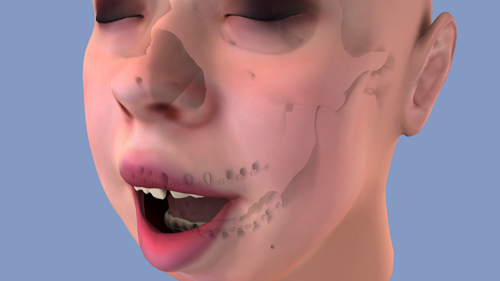
Just working with my animation footage in After Effects this afternoon, and stumbled into this image. Thought it was pretty cool and worth sharing.
That comes from layering the ambient occlusion pass of my shot with the skull set to multiply and 40% opacity, over the shot of the soft tissue in the same position so that it ghosts the underlying anatomy.
Pretty neat!
We Burn – The Closing Party
It’s your last chance to check out the bit We Burn show in Wicker Park this weekend!
This Saturday should be amazing with a great closing party followed by the Oh Gawd It Burns after party.
Saturday, April 16 · 6:00pm – 10:00pm
Setting Up Ambient Occlusion in 3DsMax
If you are anything like me, you spend a lot of time trying to remember how to do things. Because I rely on them so heavily, I thought I’d try my hand at posting some instructions on setting up an ambient occlusion pass in 3DsMax.
So, first of all, for those of you who have no idea what I’m talking about, an ambient occlusion pass is a nifty compositing trick wherein you render out an image, or series of images if you are making an animation such that objects closest to one another create shadows between them. It’s the kind of touch that can really sell the look of your objects all being in proximity. By itself, an ambient occlusion pass might look like this…
Which is neat and all, but actually gets useful when laid over your standard rendering, or beauty pass (see below)
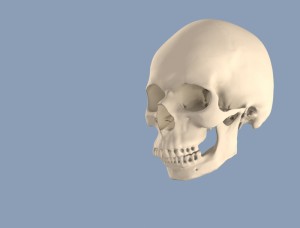 (without ambient occlusion pass)
So wow, that’s amazing, right?! And even if you don’t think it’s amazing, maybe you still think it’s nice and maybe you want this for your project too. It’s actually even cooler if you are rendering out a room, or some sort of scene with lots of objects. You’ll note that my background remains blue throughout these. That’s because I set my background that way in 3DsMax’s render settings and I’m not using a backdrop in this scene.
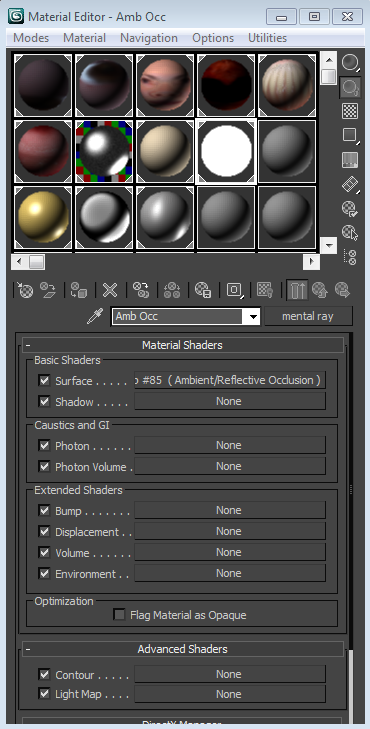
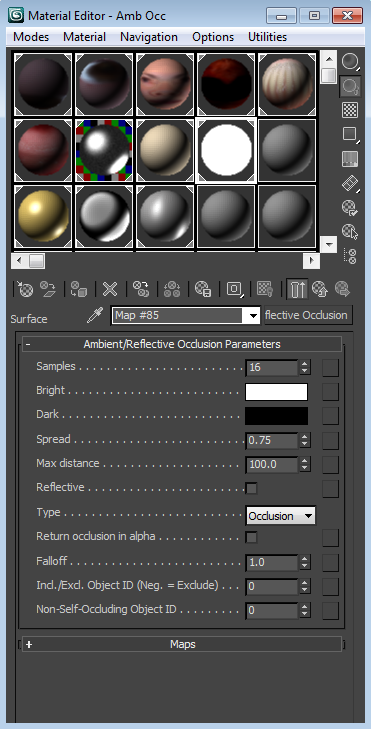
So, get your scene going in 3DsMax. That part is all up to you. Again, the more stuff, the more fun this is. Then press the M key to pull up your materials window. Fantastic. Now pick an empty globe up there to make into your ambient occlusion material. Go ahead and give it a name too. In my case I went with Amb Occ. Next to your material’s name, there should be a button that says “standard.” Go ahead and click that and under the Mental Ray texture options, click Mental Ray.
Next you’re going to click on the button that says “none” in the basic shaders next to where it says “Surface.” Select Ambient/Reflective Occlusion. At this point, your globe should look like a solid white ball.
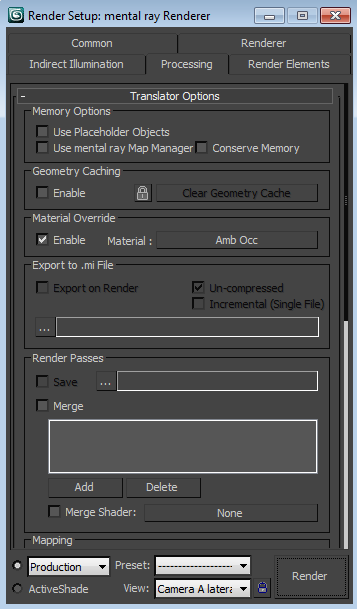
Keep that window open, but go ahead and open up your render setup window as well. Under the processing tab, check the box to enable material override (see below) and you can literally drag and drop your ambient occlusion texture into the box next to where it says “material:”. That overrides all the materials in your scene with the one you’re creating now. This is especially cool because if you want to go back to your original textures all you have to do is uncheck the box, and bingo there you are, back in your scene just the way you left it.
If you render at this point, chances are that everything, or near everything, will be white. That’s not very helpful, so go ahead and get into your parameters and change the Max Distance to a higher number (see below). I am using 100 as the max distance with my own ambient occlusion pass at the moment (yes, I am literally writing this while I’m rendering a shot, ‘cuz y’know, it was on my mind). Now, try rendering again (either by hitting the render button, or by hitting the F9 key.) Is it everything that you’d hoped it would be? If not, maybe try adjusting to different numbers, or experimenting with the other parameter options.
And there you go.
Now it’s up to you to decide how you want to use it in either Photoshop or After Effects, or another similar program. In general, you’re looking at stacking layers, and setting your ambient occlusion pass to the multiply setting, so that only the shadows come through.
Enjoy and good luck!
Sarah Kay
This video starts with a spoken word poem, and continues on to say some really nice things about communication and really art in general. It’s one of those remarkably healthy takes on art, creation, and the connections we make as artists. And I thought it was worth posting here. Don’t expect a medical talk, this one is pure art and inspiration.
The Anatomy Lesson
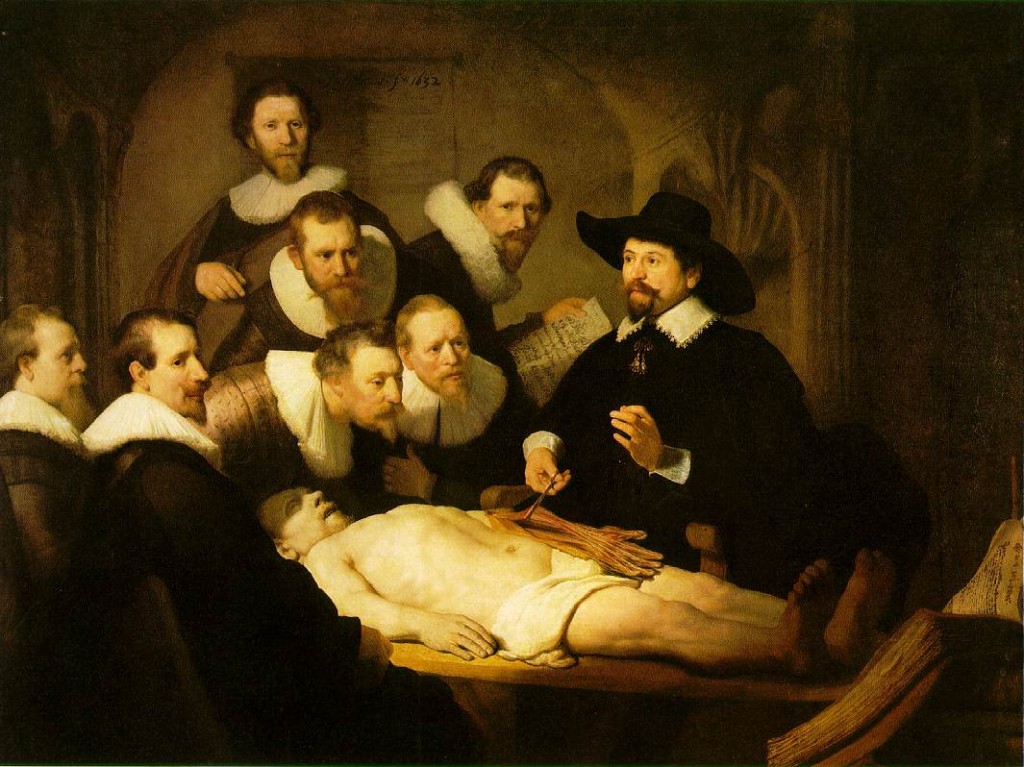
I guess it was a couple of weeks ago I found myself looking at this picture, and rather than remarking at the beautiful sense of lighting and form, and all of that warmth that Rembrandt is so deservedly known for, all I could think about was my goodness, can you imagine being dressed like that for a class dissection?!? Don’t get me wrong, it is a beautiful painting, and a fine example of chiaroscuro. I also love that he actually bothered to paint specific identifiable anatomy within this portrait of anatomy students. But just, man, we generally wore scrubs in the anatomy lab, sometimes a lab coat. But look at them! Dark, heavy, absorbent looking fabrics, and white crisp cuffs! The 1600s were different times indeed.
And yes, having said all that, Rembrandt really was one of the greats. This scene, a bunch of overdressed guys standing over a cadaver, would never have had nearly the warmth or softness in the hands of any other artist.
