Setting Up Ambient Occlusion in 3DsMax
If you are anything like me, you spend a lot of time trying to remember how to do things. Because I rely on them so heavily, I thought I’d try my hand at posting some instructions on setting up an ambient occlusion pass in 3DsMax.
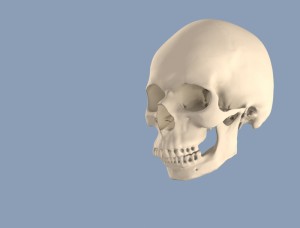
So, first of all, for those of you who have no idea what I’m talking about, an ambient occlusion pass is a nifty compositing trick wherein you render out an image, or series of images if you are making an animation such that objects closest to one another create shadows between them. It’s the kind of touch that can really sell the look of your objects all being in proximity. By itself, an ambient occlusion pass might look like this…
Which is neat and all, but actually gets useful when laid over your standard rendering, or beauty pass (see below)
 (without ambient occlusion pass)
So wow, that’s amazing, right?! And even if you don’t think it’s amazing, maybe you still think it’s nice and maybe you want this for your project too. It’s actually even cooler if you are rendering out a room, or some sort of scene with lots of objects. You’ll note that my background remains blue throughout these. That’s because I set my background that way in 3DsMax’s render settings and I’m not using a backdrop in this scene.
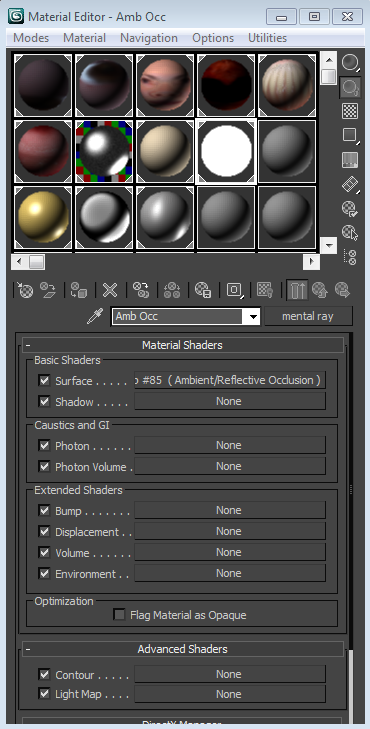
So, get your scene going in 3DsMax. That part is all up to you. Again, the more stuff, the more fun this is. Then press the M key to pull up your materials window. Fantastic. Now pick an empty globe up there to make into your ambient occlusion material. Go ahead and give it a name too. In my case I went with Amb Occ. Next to your material’s name, there should be a button that says “standard.” Go ahead and click that and under the Mental Ray texture options, click Mental Ray.
Next you’re going to click on the button that says “none” in the basic shaders next to where it says “Surface.” Select Ambient/Reflective Occlusion. At this point, your globe should look like a solid white ball.
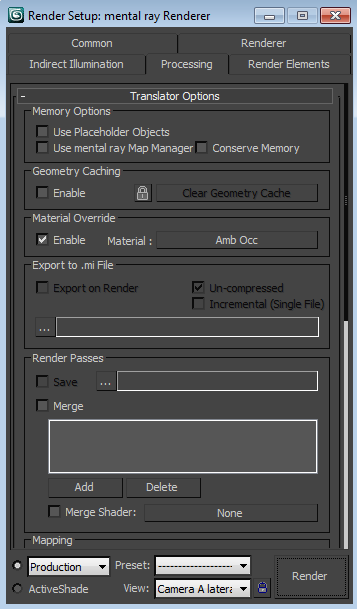
Keep that window open, but go ahead and open up your render setup window as well. Under the processing tab, check the box to enable material override (see below) and you can literally drag and drop your ambient occlusion texture into the box next to where it says “material:”. That overrides all the materials in your scene with the one you’re creating now. This is especially cool because if you want to go back to your original textures all you have to do is uncheck the box, and bingo there you are, back in your scene just the way you left it.
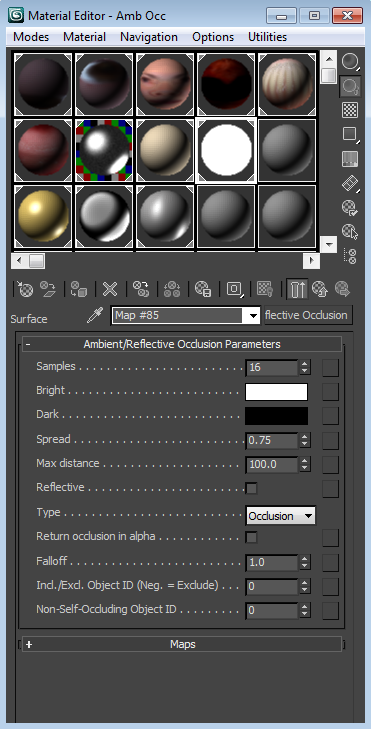
If you render at this point, chances are that everything, or near everything, will be white. That’s not very helpful, so go ahead and get into your parameters and change the Max Distance to a higher number (see below). I am using 100 as the max distance with my own ambient occlusion pass at the moment (yes, I am literally writing this while I’m rendering a shot, ‘cuz y’know, it was on my mind). Now, try rendering again (either by hitting the render button, or by hitting the F9 key.) Is it everything that you’d hoped it would be? If not, maybe try adjusting to different numbers, or experimenting with the other parameter options.
And there you go.
Now it’s up to you to decide how you want to use it in either Photoshop or After Effects, or another similar program. In general, you’re looking at stacking layers, and setting your ambient occlusion pass to the multiply setting, so that only the shadows come through.
Enjoy and good luck!


