Archive for the ‘3D’ tag
Animating DNA
I’ve been doing some work to get started on a new animation at work lately. This one is about DNA replication, and some of the animation needed to tell the story is making for some interesting challenges. Now, if you just want to model some DNA within Cinema 4D, this is hands down, the best tutorial I have seen for that.
http://www.bmc.med.utoronto.ca/bmcwiki/doku.php/technologies:cinema_4d_tutorial_-_schematic_dna_1
There’s a part 2 to that too, so do keep going if you get into the first one.
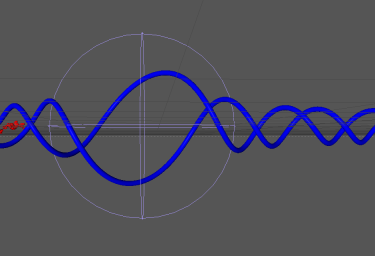
The trouble with this model though, is that you can’t unzip the DNA to show how replication works. So I’ve been trying some alternate methods lately. At first, I was very excited about getting the backbones to open up like this.
But I still couldn’t get the bases to work with me. That version was utilizing the helix shaped splines and sweep nurbs set at 130º. And the spherify deformer could be animated to open the double helix according to keyframes.
One of the tricks with trying to do this is that you can’t apply your deformers to the double helix at large without mangling your model. You do a lot better to apply them directly to your splines and set up your bases as cloners to those splines, and your backbone as sweep nurbs along those same splines, so that the individual strands maintain their shape.
I also learned, that it’s much easier to line up your bases if you start with a straight ladder sort of arrangement, and then apply twist deformers to a null object containing the double helix so that they stay together. You can then animate your deformers along the strand to wind and unwind your DNA, and with the addition of an FFD deformer along each spline, you can then animate the stream opening as you unwind it. And the big trick, that you might not think of with that – uncheck the align clone option in your cloner. For hours and hours, everything I did sent my bases all over the place, until I finally tried unchecking that box, and then they stayed align. I could go on about that for a while, but the important thing is to mention it so we all know not to get stuck like that in the future. Honestly, now that I’m thinking about it, some of my earlier attempts may have actually worked out, had I tried unchecking that box sooner.
And of course, being a big crazy 3D program, there are absolutely other ways of getting at a solution. In looking for ideas with this one, I wound up using the AMI listserve’s professional groups, and came across an animator in Germany named Andrej Piatkowski who found a way to do this without using splines at all. He felt like they just got in the way, and as you can see, he got some really cool results with what he did.
He doesn’t have it connected on the other side, the way I’m wanting for my purposes, but I love how neatly everything fits together and then rips apart so smoothly.
So remember, in your own efforts, there are many paths to the solutions you seek. But hopefully something here can help you out a little if you’re doing similar work.
Animation in Layers
Goodness me, it’s the 4th of July and I intend to go jump in a pool and play in a little while. But first I wanted to pop in and say a few words over here. Lately over at Sapling I’ve been pretty consumed with an animation that I’m putting together over there. It’s been a whole lot of work, and it’s nearly finished now. I get excited at times like these.
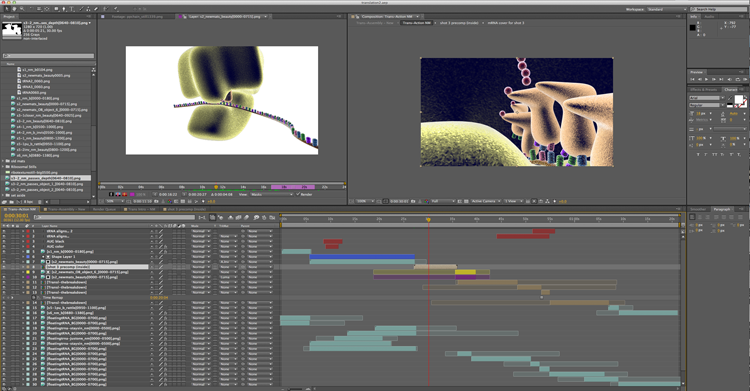
The animation is about the translation process. From a technical standpoint, it’s been interesting how much time I’ve been spending in the program, After Effects. I usually do a little compositing there, but then have generally brought my work into Final Cut Pro or something like that to finish up the actual shot arrangement. With this one, I’ve found it made more sense to actually just put the whole thing together in After Effects. I’m having to be really careful about organization and use a lot of pre-compositions. And even so, I don’t believe that I have ever taken on this many layers of video to wrangle for another project in my entire life. That’s the thing about animation though I guess. You literally make all of it from scratch.
One thing that I don’t care for in After Effects as opposed to your more editing and less effect driven software, is it’s insistence that every little thing have it’s own layer. This has been one of those pieces for which I’ve wanted a lot of layered subtlety going on behind the scene. It would have been nice to be able to dedicate a couple of tracks for that, rather than adding a new one for every piece of footage used. That being said though, After Effects does a great job at handling image sequence footage and you do have a great deal of control over a lot of details. Still, if anyone from Adobe happens to read this, maybe the next version could at least give us the ability to group tracks into folders. For when you don’t quite want to create a pre-composition and send your tracks to another timeline, but you still want to clean them up a bit for viewing sake, or to add some sort of matting to the whole bundle, just that one little thing would make After Effects so much better in general.
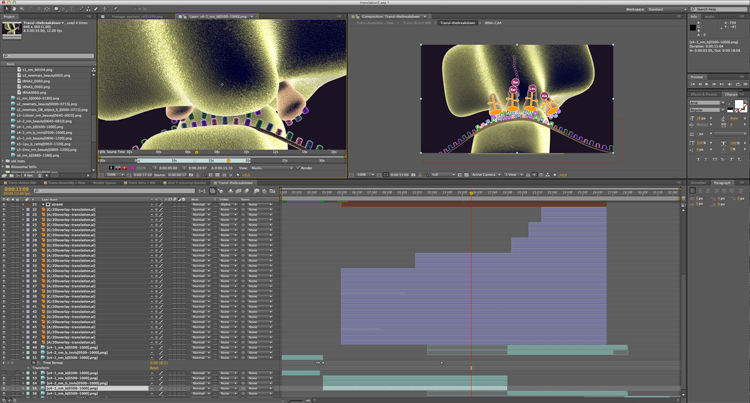
I especially thought that when I got into the part of this animation that I like to call the breakdown. Textbooks often use similar static illustrations to represent things that may or may not atomically look like the molecule in question. And really it’s only rather recently with the work of Dr. Venki Ramakrishnan (video link to a lecture of his about the ribosome and translation process) that we even fully know the exact structure of the ribosome. So one of the things that I’ve been excited to do with this one is to create some more standard looking images and then layer them over the 3D animation. I then keyframed the individual components to follow their 3D counterparts so we can actually see the connection between those representations and a more 3D space. I have been simultaneously irritated with myself for coming up with such a time consuming and intricate thing to create to tell this story, while also really psyched to get to break everything down so clearly. As it’s come together, every codon in the 2D overlay has had to have it’s own layer in After Effects, but now that I finally have everything placed and animated, I’m really excited about it. Back in school, I recall one of our teachers, John Daugherty, telling us about how every piece that you do has to have that thing that makes it really interesting to you as an artist. Whether it’s a concept, or a technique, or whatever, and I think this part of this animation is that for me. It’s something that I don’t see other animations doing, and for me it’s like wrapping up that little aha moment that you get when you’re watching these sorts of things and you finally figure out how one representation relates to another and start to get what it is that you’re seeing.
As you can see, though, I’ve got these huge blocks of layers in the timeline there. At one point, I had more than 60 in there, and that’s with many of them being pre-compositions that lead to more layers in another timeline. But it’s working. And I just love it when things work.
This is going to be a good one.
The Enzyme Substrate Complex
So, some of you may remember my recent post, “Molecules Molecules Molecules.” Well I’m really psyched to be able to share the animation that inspired that post with you all online now.
Enzyme Substrate Complex from sara egner on Vimeo.
I’m excited to get to show a little bit of the kind of work I’ve been doing lately over at Sapling. And I’m glad I get to share this one in particular because I know it goes just that extra step beyond the kinds of videos you find on this subject out there. And I’m loving that we get to make things like that. I get to work with biology experts. And when things get really really tiny, no one says, well that’s really just chemistry at that point – don’t worry about it. We just talk to a chemist about it. And if I hit a technological glitch, we have those kinds of experts around too. And I’d thought that my move into grad school was going to be a move away from all the video work I used to do. But here I am drawing back on all of that experience to make things like this now. And of course my whole little fascination with ATP comes in to play with this one. But that would be a whole other story. And this writer is winding down for the night.
Histological Visualization
Perusing through some news today I found a few articles siting new software that is bringing 3D visualization into the histological realm. Basically they are taking histological slides and using the same type of algorithms that CT and MRI use to generate 3D images that can be moved about in space and studied.
Reading these, I was really surprised to hear that such a thing hadn’t already existed. It seems like something that you could do with Mimics honestly. But I suppose it was the actual data collection at the microscopic level that wasn’t quite available. Without a scanner doing the registration for you, one is left with having to work out each individual slide’s relationship to the next, and that could certainly eat up some time. But Dr. Derek Magee at the University of Leeds seems to have found a good way of handling that. So the person using his software scans in prepared slides, and the alignment happens automatically and a 3D image is presented.
I find it puzzling that these articles about the technology keep referring to the scanners as “virtual slide scanners.” It doesn’t sound like there is anything “virtual” about them aside from the end result they produce of allowing a virtual 3D image. Every description seems to talk about an actual physical slide being scanned for digital information. That sounds like a scanner to me. But I leave that one up to any of you reading to decipher whether you think I’m just missing something, or someone early on was quoted while trying to push technological buzzwords. In my experience, either of those things could easily be true.
The work has been published in The American Journal of Pathology but is also discussed in these articles.
http://www.medicalnewstoday.com/articles/244203.php
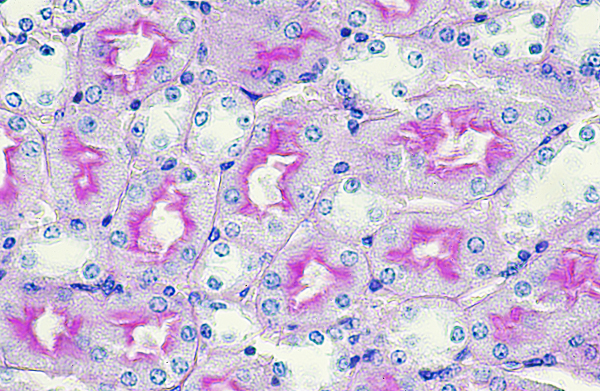
*image above is from a traditionally prepared histological slide*
Molecules Molecules Molecules!
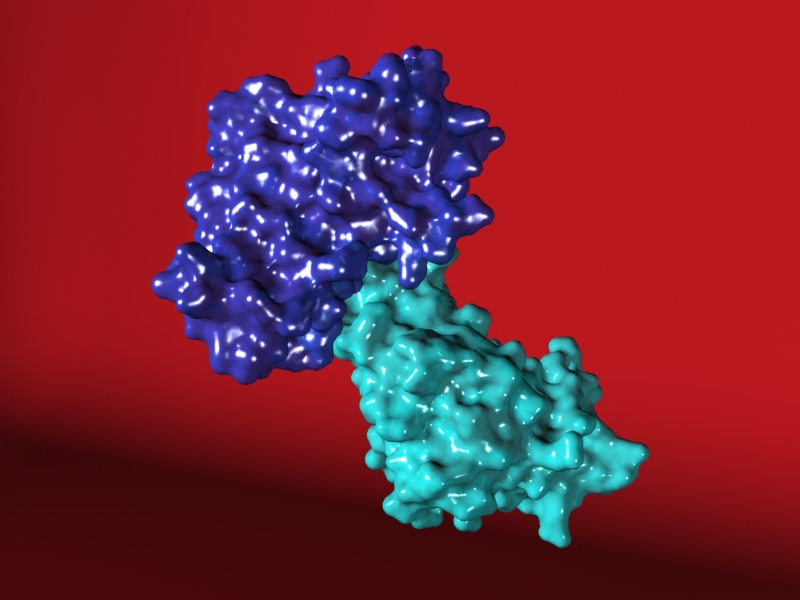
This week, I’ve been engrossed in making molecular movie magic! When I was a student at UIC, we learned about the Protein Data Bank, and I thought that was pretty cool. We would bring files into a free program called Chimera, clean them up a bit, and export them as .stl or .obj files, anything we could pull into 3DsMax. I think that with larger files, you would also have to take the intermediate step of going into Mesh Lab to try and reduce your polygon count. From there, you could put any kind of material on them, set up lighting, do anything you wanted to.
I think that this was the first one I ever tried…
The image itself may not be all that impressive on it’s own right, but I remember being excited because I’d found something related to a good friend’s graduate work. I wish I could remember the name of it now, but I know it was tied to the magnetic bacteria that Cody studied when he was at CalTech. And just the thought of being able to search for and find 3D data related to a friend’s work like that, to be able to bring it into a 3D space and look at it, and then further still, be able to make something of it, and render it into an image that could be shared, well that all seemed pretty exciting.
A year or two later, they came out with Molecular Maya. This took out all the difficulty of working with Chimera, and allowed you to pull data directly from the PDB (Protein Data Bank) into Maya (which is another 3D animation program, much like 3DsMax).
Since coming to work for Sapling Learning, I have been using Cinema 4D (as opposed to either Maya or 3DsMax). And I have a plug-in downloaded called ePMV which is short for Embedded Python Molecule Viewer. It’s pretty awesome. Much like with Molecular Maya, you get to bring files directly in to your 3D scenes, without having to use other software in the interim.
I’m not sure if it didn’t exist before, or if I just didn’t know about it my first times trying to navigate the PDB, but finding PDB 101 was been a great help in being able to find the right proteins when looking for something specific. It’s also been a wealth of information when I’m trying to understand more about a molecule that I’m working with.
But I have to say that what I’m really excited about this week, is the realization that Marvin Sketch can be used to get a .pdb file on any molecule that you can draw. A coworker/chemistry genius showed me the Marvin Sketch Molecule Viewer, and I knew it was awesome when he did, but the more I get my head around all this, the more awesome this tool becomes. You can literally draw out any molecule you know the arrangement for, ask it to clean it up in either 2D or 3D for you, and if you’re looking at the 3D, you can export the file as a .pdb and just like that you have everything you need to bring it in via ePMV and use it for static illustration or animation.
Now this still leaves me limited by the fact that I really don’t have a background in chemistry, and I often don’t know how to draw out the thing that I want (though I am learning a lot of that sort of stuff these days). So how amazing did I feel when just this week I noticed SMILES (Simplified molecular-input line-entry system.) Oh yeah. So there I am, scouring the internet for a clean model of ATP (adenosine triphosphate). And there are literally thousands of references to it within the PDB but it’s always with something. I wanted to find it by itself. And then I’m looking at the Wikipedia page on it. They have 3D models featured. Clearly this data is out there. I should be able to find it. And then I’m looking at the formula for ATP, and it’s C10H16N5O13P3. So I think to myself, that if I were better at drawing out molecules, I could just get it out of Marvin sketch. But sometimes Wikipedia has links to PDB pages, where was that? Well it didn’t have that but it did have a listing where you could show SMILES data
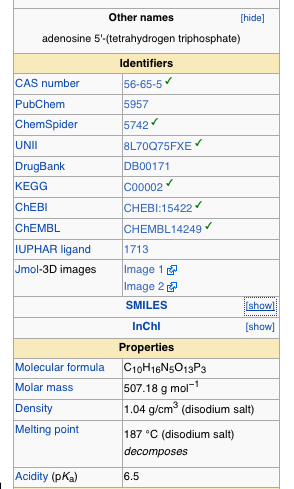 And if you just click the box that says show, next to SMILES, it gives you a code. You copy that code and paste it right into Marvin Sketch Molecule View SMILES loader
And just like that, you can get any molecule that you have that code for. I did this for ATP, ADP, glucose, and glucose 6 phosphate. They all had a SMILES code, listed right there in Wikipedia. And I was able to save .pdb files right my local computer’s desktop. And when I pulled them all in to Cinema 4D with the ePMV plug-in, I realized that it was easy to see exactly what atoms are coming off of one molecule and added to the other in the process I am working with. And because it was all so accessible like that, we’re going to be able to show people that, really clearly.
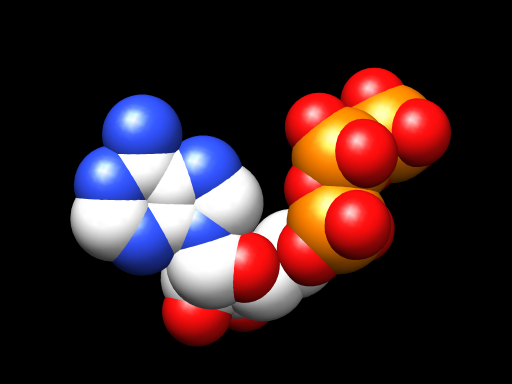
I don’t have any of my files from work handy here, but just now I put ATP’s code into the SMILES loader of Marvin Sketch and exported a 3D PDB file. I opened the file using Chimera and in less than a minute had this.
And if I were doing this in a 3D animation program, I could take things further still and make it pretty, make it move. Or I could grab that last bundle of spheres there, the last yellow (phosphorous) and the reds (oxygen atoms) clinging to it, and pop that right off to show you the difference between ATP and ADP, and what exactly that means when people talk about that happening.
I think that’s really friggin cool!
Well, I suppose I should stipulate that we’re *almost* seeing exactly how that works. I just learned today that there’s hydrogen in there too, but chemists seem to have this game of hide-the-hydrogen that they like to play on the rest of us. They claim it’s clearer that way. They’re probably right, but I’m not 100% sold yet. Still, except for the invisible hydrogen atoms, this is what ATP looks like. This is it’s shape. And all those reactions in the body where ATP gets converted to ADP are just this little guy getting a little bit shorter when that last phosphate group teams up somewhere else.
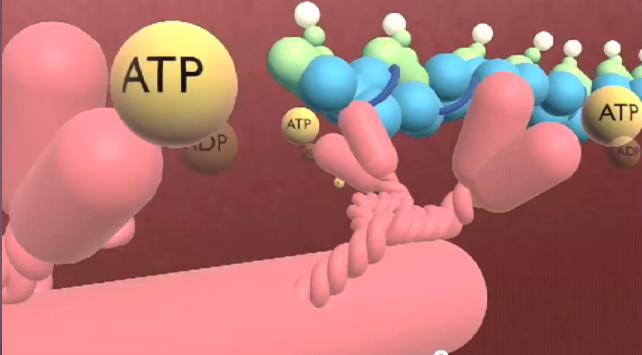
When I made my sliding filament animation, I remember having no idea what ATP actually looked like. I remember talking to other people about it, and none of the people I spoke to knew either. I wound up representing it with big yellow spheres in the animation. And that worked for the piece that it was, and was actually very clear in terms of what needed to be shown there. But I just love that this week, while trying to figure something out about ATP I wound up with not only a better picture of it, but my own model to play with and animate.
I suppose that lately it’s just been molecules molecules molecules for me. I never thought I would get this into the micro world, but I have to say, I think it was time. And with all this technology, all these programs making it easier than ever to really see and get a handle on what everything really is, well, I can’t think of a better time to be learning this stuff.
Bugs!
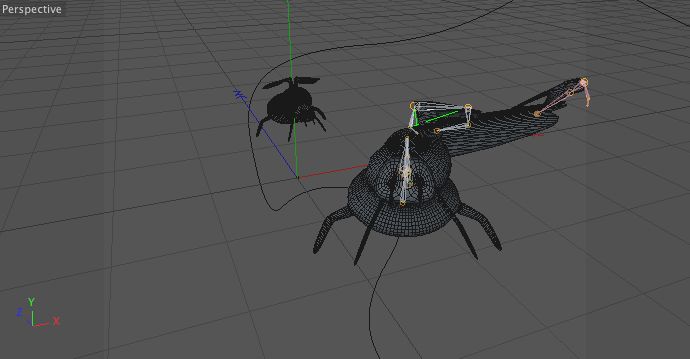
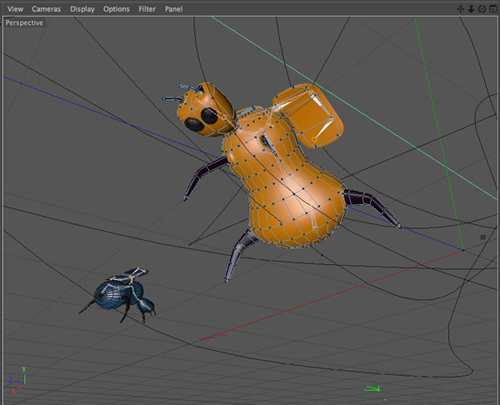
So, I’ve been doing a lot of work in Cinema 4D at the new job lately (with Sapling Learning), and most recently that’s been getting to make bugs and make them fly. Basically we’re animating a classic genetics example with different colored bugs, and what this has meant for me is that I’ve been able to make one of the more complex models I’ve done to date with this program in making my little bug to begin with, and then I’ve also been able to get into joints and IK rigging with the program. This was something I’d done once before in 3DsMax, but not really had a lot of experience with. The main thing I wanted the joints for was the flapping of his wings, but by giving him a spine I was able to turn his head and body a little as well and the little guy that much more life.
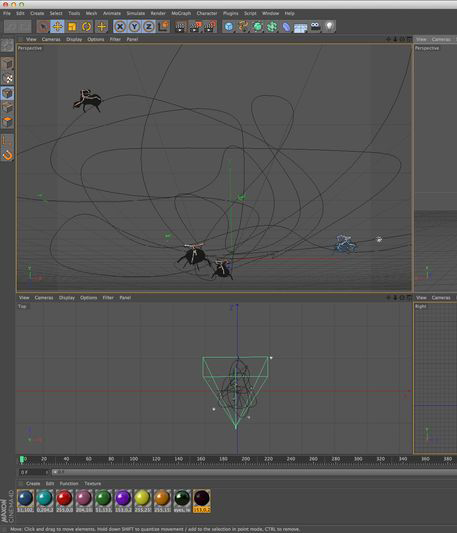
I had some difficulty for a while with getting the joints to work correctly. I wasn’t able to use any of the templates, so in the end I just used the joint tool and ctrl-clicked my way through the construction of wings. You then go through and place the IK chains which will define how your object moves as a whole. Cinema 4D will automatically assign your object a skin tag which will allow you to get more natural looking movements. To set up the wings I used a linked symmetry in modeling the joints. It was great for modeling, and for recording the keyframed animation of the wings flapping, but that later proved problematic when I tried to move my bug around the scene.
What you’re seeing there is my poor little bug’s right wing being pulled off as he moves away from the Z axis in an attempt to keep that linked symmetry across that axis. Naturally I was convinced that I’d made a huge mistake and there was no getting out of it without undoing at least a day’s work. But it wasn’t the case. As it turns out, when you select the individual joints themselves that are doing the mirrored symmetry, you find a tab that allows you to adjust that symmetry. And because my model had a spine, I was able to change the symmetry from world to object and select a joint in the spine as that object. So I didn’t loose my joint structure, or even my keyframing of the flapping.
Being free to roam a 3D world again, I was able to make copies of my bugs and draw splines for them to fly along. In the end it all looks and feels a little like designing a roller coaster.
It’s strange, modeling in so many layers. Conceptually I sometimes have difficulty getting my head around moving the skeleton and taking the bug with it, vs moving the geometry, or the hypernurb or skin itself. It’s easy to get confused (well, it is for me anyways). But I have to say that I think there is something to all these rumors of Cinema 4D being more intuitive than other competing programs. Sometimes things just work.
Oh, and one last note for all the rookies out there like me… My art director suggested a couple changes, one of which was giving my bugs some eyes when she saw what I had going. So I did, but had a little trouble with them falling right back out of my bug’s head when they would fly. There was no binding or boolean that was quite going to get me around this. But having that spine in place saved me again. I made the eyes a child of the last joint that controlled the head’s movement and that did the trick perfectly.
I’m pretty well on to After Effects with it all at this point (time to make it pretty, and also bring the focus back to making it a clear and understandable example of the principles it was created to display in the first place), but I just wanted to get a few notes down here as to process and getting unstuck as problems come up. I’m finding that whether or not any of you readers are using this blog to work your way out of tricky spots in animating, I seem to be coming back to it to remind myself of things more and more.
Animation and 3D capture software
So, last Friday, I had a little time in the morning to watch a tutorial. My co-worker, Alex, had recommended this one, and she was right. For those of you learning Cinema 4D like I am, this tutorial not only gets into UVW painting and pelt mapping, but is also a really great modeling tutorial.
So, I’m telling her how great this is, and she tells me that Greyscale Gorilla (the company that puts these out) is appearing that very night at a Cinema 4D/ live music event (SXSW, really brings all kinds of events out of the woodwork here in Austin.)
So I went, and it was a really good event. When I got there, a man named Nick (and unfortunately I can’t remember his last name) taught us a bit about using Cinema 4D’s cloner and animating spheres along a spline. I definitely learned a few things from that talk. And then the next speaker was a man named David Lewandowski who spoke about his use of Cinema 4D in a new music video. His talk was fun because it was the first time I’d seen anyone integrating this stuff into actual video to do special effects. And what really caught my attention was the 3D scanning software he was using to capture the actors’ faces into his 3D software and integrate it within the video.
Back when I was training with the craniofacial clinic at UIC, there was a lot of attention to 3DMD and working with CT and MRI data to get 3D data for both surgical planning and also facial prosthetic development. I have spoken with various anaplastologists over the last few years about this as well. So when this guy gets up and talks about how he pulled together this video on a shoestring budget and paid about $50 for some Russian software that he used to upload photos of the actors (all taken from the same camera), and got these seemingly accurate 3D models out of them, I had to ask him about it later.
He told me that the software was called Agisoft Photoscan, and that there is also an Autodesk product currently in beta testing called Photofly. The friend I brought with me to the event told me that some people are even hacking into their XBox 360 gaming consoles and managing to capture 3D data through the technology already present in those machines as well. I find all of this to be very exciting from the perspective of what potential it brings to a field like anaplastology where you have a strong need for accurate 3D information about patients, but not always the financial structure to afford the latest and greatest technology at every turn. This also opens the door to better international consultation. If all one needs on the spot is a decent camera and an internet connection, then better information can be sent overseas allowing for better preparation before a patient makes the trip in person. Possibly, you could even come up with a good temporary piece for someone to wear in the interim while they are waiting on their final prosthesis to be made.
I leave you with this short YouTube clip of someone playing with Agisoft’s software to capture movement.
And I’d better get going because there is another one of these little 3D get together’s tonight!
The Brain in Orgasm
So, this is going to have to be one of those brief posts today, but I did want to point your attention at an interesting new 3D animation out there on the human brain in orgasm. This is neat for a number of reasons. For one, it’s about sex, always a popular topic. For another, it’s about brains, and lets face it, brains are awesome. People love brains almost as much as they love sex. And lastly, the team working on this decided to start with women as their test subjects. Health studies have long been criticized for focusing on male anatomy and often neglecting women’s health, or at best, later coming to it as an afterthought. Well, this time the data starts with the ladies.
Here is the video. And for those of you looking closely, that’s over 80 regions of the brain lighting up. The brightest yellow you see signifies the greatest use of oxygen in that area (which is how activity is being measured here). Reds signify activity but at lower levels.
The video was only just presented at the Society for Neuroscience conference last week, and has not yet been peer reviewed for publication. More information on this can be found here at Time Healthland, or here at the NY Daily News, or you can go directly to the video’s initial appearance on The Visual MD’s website.
The Bilateral Sagittal Split Osteotomy and Osseous Genioplasty
So, I was going to wait until I’d shown this in my big presentation next month, but I just couldn’t. I put it up tonight.
Introducing, The Bilateral Sagittal Split Osteotomy and Osseous Genioplasty…
And if that doesn’t work, here’s a direct link to the YouTube page itself – http://www.youtube.com/watch?v=oQI8L5Sxa6w
Still Shot from Working with my Animation
Just working with my animation footage in After Effects this afternoon, and stumbled into this image. Thought it was pretty cool and worth sharing.
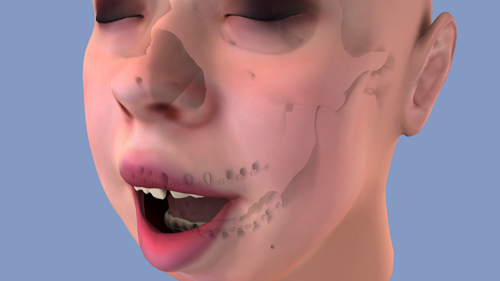
That comes from layering the ambient occlusion pass of my shot with the skull set to multiply and 40% opacity, over the shot of the soft tissue in the same position so that it ghosts the underlying anatomy.
Pretty neat!
